

Gardening can be rewarding and fun. DIY raised garden beds make it even better.
Building your own raised garden bed offers many benefits. It allows you to control the soil quality and makes gardening easier on the back. Plus, you can design it to fit your space perfectly. Whether you’re a beginner or a seasoned gardener, creating a raised garden bed can be a simple and fulfilling project.
This blog will guide you through some of the best DIY raised garden bed plans. You’ll learn how to get started, what materials to use, and some tips to ensure your garden thrives. Let’s dive into the world of DIY gardening and create a beautiful, productive garden together.
Table of Contents

Credit: www.instructables.com
Benefits Of Raised Garden Beds
Raised garden beds are becoming a popular choice for gardeners. They offer numerous benefits that can make gardening easier and more productive. Whether you’re a seasoned gardener or a newbie, raised beds can help you grow healthier plants with less effort.
Improved Soil Quality
One of the main benefits of raised garden beds is the improved soil quality. Raised beds allow you to control the soil composition. You can mix soil, compost, and other organic materials. This creates a nutrient-rich environment for your plants.
Here are some advantages of improved soil quality:
- Better root growth
- Fewer weeds
- Enhanced soil fertility
With raised beds, you can avoid compacted soil. Plants can spread their roots easily. This leads to stronger and healthier plants.
Better Drainage
Another significant benefit is better drainage. Raised beds are elevated above the ground. This allows excess water to drain away from plant roots. Proper drainage prevents waterlogging and root rot.
Consider these points for better drainage:
| Benefit | Explanation |
|---|---|
| Prevents waterlogging | Water drains quickly through the soil |
| Reduces root diseases | Dry soil is less prone to disease |
| Improves aeration | Roots get more oxygen |
Raised beds also warm up faster in the spring. This means you can start planting earlier. Your growing season can be extended, giving you more time to enjoy your garden.
Choosing The Right Location
Choosing the right location for your DIY raised garden bed is crucial. Your plants need the best conditions to thrive. Here’s how to find the perfect spot.
Sunlight Requirements
Sunlight is vital for most plants. Ensure your garden bed gets at least six hours of sunlight daily. Check your yard at different times of the day. Note where the sun shines the longest. South-facing areas usually get more sunlight. Avoid placing your garden bed near large trees or buildings. They can cast shadows and block sunlight.
Proximity To Water Source
Easy access to water is important. Place your garden bed near a water source. You’ll need to water your plants regularly. A nearby tap or hose makes this task easier. Carrying water long distances is tiring and time-consuming. Also, check the soil drainage in your chosen spot. Good drainage prevents water from pooling and harming your plants.
Selecting Materials
When creating a DIY raised garden bed, selecting the right materials is crucial. The materials you choose will impact the garden bed’s longevity, appearance, and environmental impact. Let’s explore some popular options.
Wood Options
Wood is a common choice for raised garden beds due to its natural look. Cedar and redwood are popular because they resist decay and insects. Pine is another option, but it requires treatment to last longer. Treated wood can resist rot, but ensure it is safe for gardening. Avoid old railway ties as they may contain harmful chemicals.
Alternative Materials
If wood isn’t your preference, consider other materials. Concrete blocks provide durability and a modern look. They are easy to stack and arrange. Metal beds, like galvanized steel, offer a sleek, industrial appearance and resist rust. They can get hot in direct sunlight, so consider placement. Recycled plastic lumber is another eco-friendly option. It lasts long and requires no maintenance.
Each material has its pros and cons. Choose what fits your garden vision and needs best.
Designing Your Garden Bed
Designing your garden bed is an exciting part of building a DIY raised garden bed. The design impacts both the look and functionality. Consider the bed’s size, shape, and height for the best results.
Size And Shape
The size and shape of your garden bed depend on your space and plants. A common size is 4 feet by 8 feet. This size is easy to manage and allows for diverse planting.
Square or rectangular beds are popular. They fit well in most yards. Circular or L-shaped beds can add visual interest. Choose a shape that fits your garden’s layout.
Tip: Ensure you can reach the center of the bed. This makes planting and harvesting easier.
Height Considerations
The height of your raised bed affects plant growth and ease of use. A common height is 12 to 18 inches. This height is ideal for most vegetables.
Higher beds, around 24 inches, are great for root vegetables. They are also easier on your back. If you have poor soil, consider a taller bed.
Here’s a quick guide:
| Bed Height | Best For |
|---|---|
| 12 inches | Most vegetables |
| 18 inches | Deeper roots |
| 24 inches | Root vegetables |
Tip: Taller beds require more soil. Plan accordingly to ensure you have enough.
Building The Frame
Building the frame of your DIY raised garden bed is crucial. It provides the structure and stability needed for your garden. With the right tools and a step-by-step guide, you can create a sturdy frame for your garden bed.
Tools Needed
Before you start, gather the necessary tools. Having everything ready will make the process smoother.
- Measuring Tape: To measure the wood accurately.
- Saw: To cut the wood to the required lengths.
- Drill: To make holes for screws.
- Screws: To join the wooden pieces.
- Level: To ensure the frame is even.
- Safety Gear: Gloves and goggles for protection.
Step-by-step Instructions
Follow these steps to build a strong and durable frame for your raised garden bed.
- Measure and Cut the Wood: Use the measuring tape to mark the desired lengths. Cut the wood using a saw.
- Assemble the Frame: Lay out the pieces to form a rectangle or square. Ensure the corners are aligned.
- Drill Pilot Holes: Use the drill to make pilot holes for the screws. This prevents the wood from splitting.
- Secure the Corners: Insert screws into the pilot holes to join the pieces. Check that each corner is secure.
- Check for Level: Use the level to ensure the frame is even. Adjust if necessary.
- Reinforce the Corners: Add extra screws or corner brackets for added strength.
Now you have a solid frame ready for your raised garden bed. The next steps will involve preparing the bed for planting. Stay tuned for more tips and instructions!
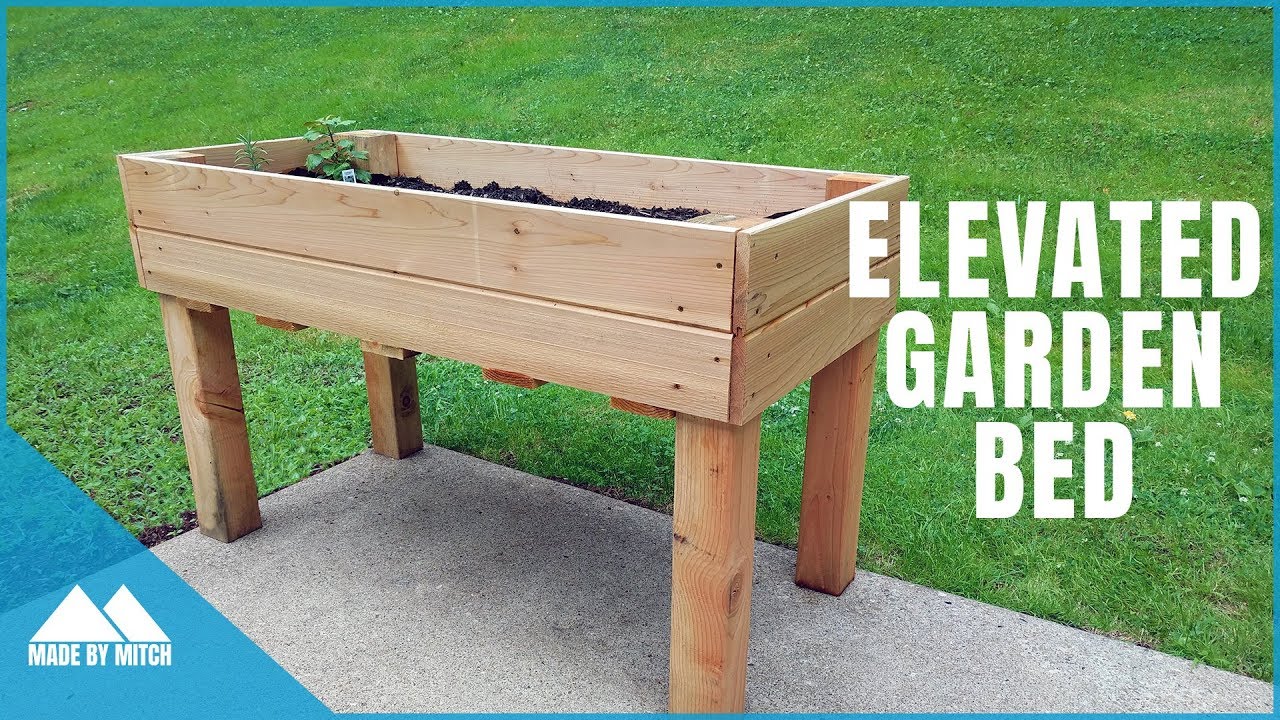
Credit: www.youtube.com
Filling With Soil
Filling your DIY raised garden bed with soil is a crucial step. The right soil mix and layering techniques will ensure healthy plant growth. Let’s explore the best methods to fill your raised garden bed.
Soil Mix
Choosing the right soil mix is essential for a thriving garden. A good mix includes:
- Topsoil
- Compost
- Peat moss
- Vermiculite or perlite
Topsoil provides structure. Compost adds nutrients. Peat moss helps retain moisture. Vermiculite or perlite improves aeration.
| Component | Function |
|---|---|
| Topsoil | Structure |
| Compost | Nutrients |
| Peat Moss | Moisture Retention |
| Vermiculite/Perlite | Aeration |
Layering Techniques
Proper layering techniques are key to a healthy garden bed. Follow these steps for optimal results:
- Start with a layer of cardboard or newspaper. This suppresses weeds.
- Add a layer of coarse organic material. Use straw or leaves. This improves drainage.
- Next, add a layer of compost. This provides essential nutrients.
- Top it off with your soil mix. Ensure the bed is filled to the top.
Each layer serves a purpose. Together, they create a fertile environment for your plants.
Planting Your Garden
Starting a garden in your raised bed can be exciting. With careful planning, you can grow a variety of plants. This section will guide you through the process.
Choosing Plants
Choosing the right plants is crucial. Consider your climate and soil type. Some plants thrive better in specific conditions.
- Vegetables: Tomatoes, lettuce, carrots.
- Herbs: Basil, mint, rosemary.
- Flowers: Marigolds, petunias, zinnias.
Tip: Start with plants that are easy to grow. This ensures success and builds confidence.
Planting Layout
Organizing your garden helps in maximizing space. Follow these steps for an effective layout:
- Measure: Know the dimensions of your bed.
- Plan: Draw a simple sketch on paper.
- Group Plants: Place similar plants together.
- Spacing: Ensure proper spacing for growth.
Here is a sample layout for a 4×4 raised bed:
| Section | Plants |
|---|---|
| 1 | Tomatoes |
| 2 | Lettuce |
| 3 | Basil |
| 4 | Carrots |
Tip: Rotate plants every season to keep the soil healthy.
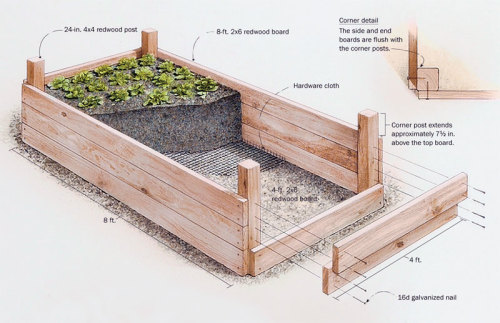
Credit: www.finegardening.com
Maintenance Tips
Maintaining a DIY raised garden bed ensures healthy plants and a bountiful harvest. Knowing the right maintenance tips can make your gardening experience more enjoyable. Here are some essential maintenance tips for your raised garden bed.
Watering Schedule
Establishing a regular watering schedule is crucial for plant health. Water your plants early in the morning. This allows the soil to absorb moisture before the sun gets too hot. Use a soaker hose or drip irrigation system to water deeply. Avoid overhead watering to reduce leaf diseases. Check the soil moisture regularly. Insert your finger into the soil up to the second knuckle. Water if the soil feels dry at that depth.
Weed Control
Weeds compete with your plants for nutrients and water. Regular weeding keeps your garden bed healthy. Use mulch to suppress weed growth. Organic mulches like straw or wood chips work well. Apply a 2-3 inch layer around your plants. This helps retain moisture and blocks light from reaching weed seeds. Hand-pull weeds when the soil is moist. They come out easier this way. Dispose of weeds properly to prevent them from reseeding.
Frequently Asked Questions
What Is A Raised Garden Bed?
A raised garden bed is an elevated planting area. It provides better drainage, soil quality, and easier access for gardening.
How Deep Should A Raised Garden Bed Be?
A raised garden bed should be at least 6-12 inches deep. This allows for adequate root growth and drainage.
What Materials Are Best For Raised Garden Beds?
The best materials for raised garden beds are cedar, redwood, and untreated wood. These materials are durable and resist rot.
How Do You Fill A Raised Garden Bed?
Fill a raised garden bed with a mix of topsoil, compost, and organic matter. This ensures nutrient-rich soil for plants.
Conclusion
Creating your own raised garden bed is rewarding and fun. You get fresh vegetables, beautiful flowers, and a sense of accomplishment. With simple tools and basic materials, you can build a garden bed. This project is great for beginners and experts alike.
Follow our plans, and soon you’ll enjoy a thriving garden. Start today and watch your garden grow. Happy gardening!