
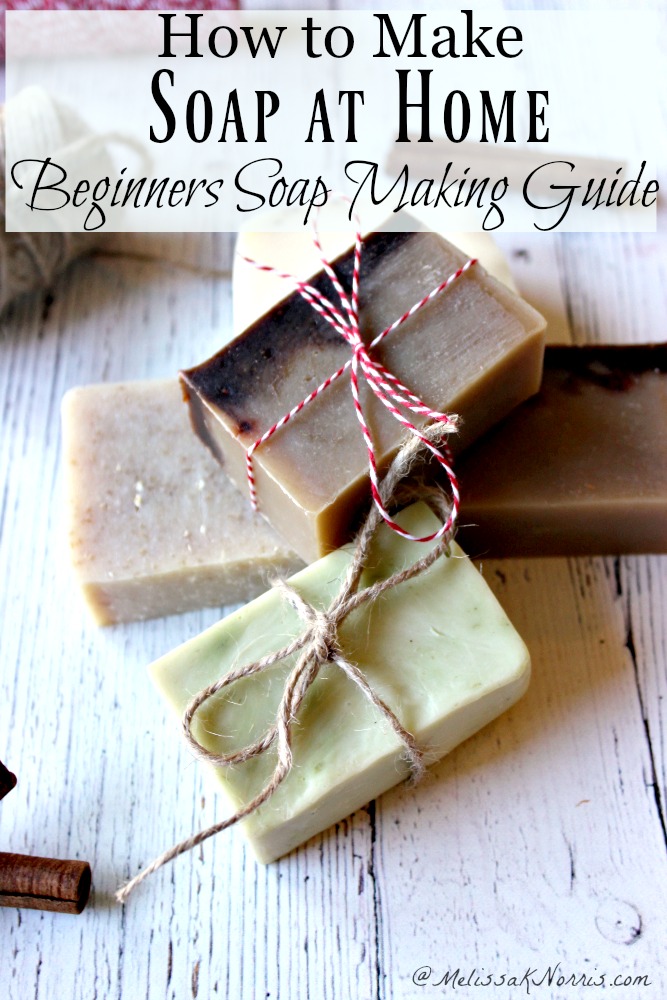
Making your own soap at home can be fun and rewarding. It is a great way to control the ingredients and create something unique.
For beginners, homemade soap recipes can seem complex. But with the right guidance, anyone can get started. This blog post will help you navigate the basics of soap making. From understanding the ingredients to following simple recipes, you’ll find all you need here.
Whether you’re looking to make soap for personal use or gifts, this guide will be your starting point. Dive in to discover how easy and enjoyable making soap can be. Let’s get started!
Introduction To Homemade Soap
Making your own soap at home is a fun and rewarding hobby. It allows you to control the ingredients, ensuring that your soap is natural and free from harsh chemicals. Whether you are looking for a creative outlet or a way to personalize your skincare routine, homemade soap is a great option for beginners.
Benefits Of Making Your Own Soap
There are many benefits to making your own soap. Here are some key advantages:
- Customizable: Choose your own scents, colors, and ingredients.
- Natural Ingredients: Avoid synthetic additives and harsh chemicals.
- Cost-Effective: Save money by making soap at home.
- Creative: Experiment with different recipes and designs.
- Eco-Friendly: Reduce plastic waste by using homemade soap.
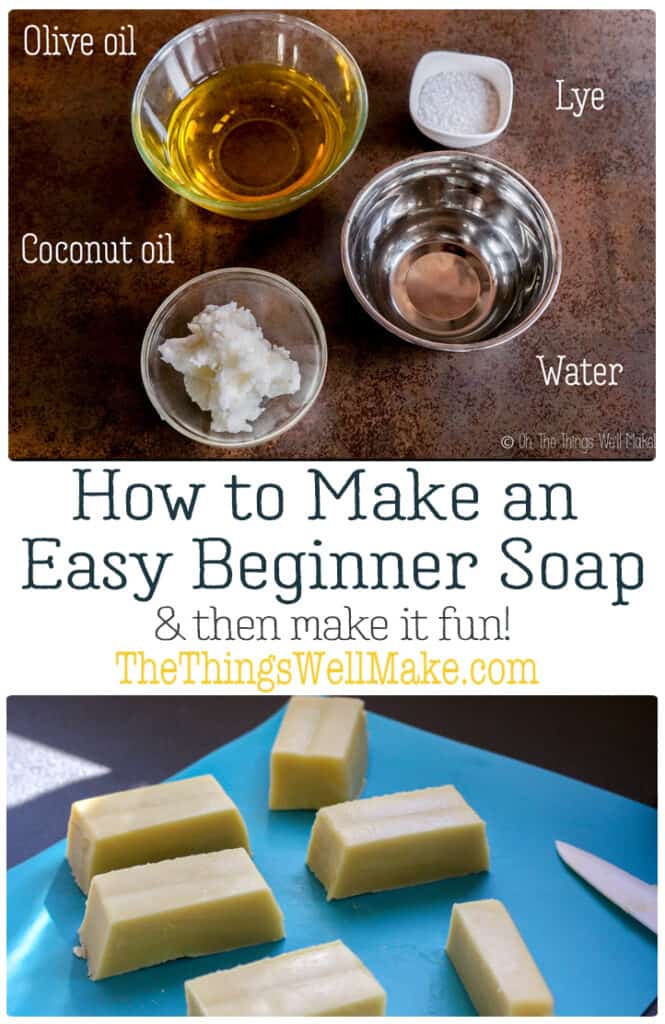
Basic Soap Making Ingredients
To get started with soap making, you will need some basic ingredients. Here is a list of essentials:
| Ingredient | Description |
|---|---|
| Oils and Butters | Common choices include olive oil, coconut oil, and shea butter. |
| Lye | Sodium hydroxide, a necessary component for soap making. |
| Water | Used to dissolve lye and mix with oils. |
| Essential Oils | Add fragrance and therapeutic benefits to your soap. |
| Colorants | Natural options include clays and botanicals for coloring. |
With these basic ingredients, you can start making your own soap at home. Remember to always follow safety guidelines when handling lye and other materials.

Credit: savingandsimplicity.com
Essential Tools And Equipment
Starting with homemade soap making can be exciting and rewarding. Before diving into recipes, it’s crucial to know the essential tools and equipment. Having the right tools ensures safety and success in your soap-making journey.
Safety Gear
Safety is paramount when making soap. Always wear protective gear. A pair of safety goggles protects your eyes from splashes. Use long gloves to shield your hands from lye. An apron keeps your clothes clean and safe. A face mask prevents inhalation of any fumes.
Soap Making Tools
Gathering the right tools makes the process smoother. A digital scale ensures accurate measurements of ingredients. A thermometer helps monitor temperatures. Use stainless steel or heat-resistant plastic bowls for mixing. Avoid aluminum as it reacts with lye.
A stick blender speeds up the mixing process. Silicone molds are flexible and easy to clean. A soap cutter provides even slices. A spatula helps scrape every bit of soap from the bowl. Remember to label these tools for soap-making use only.
Cold Process Soap
Cold Process Soap is a traditional and creative method for making soap at home. It involves mixing oils and lye to create a smooth and luxurious soap bar. This method allows for a lot of customization. You can choose your favorite scents, colors, and additives. The process takes a bit of time and patience but the results are well worth the effort.
Step-by-step Guide
Making cold process soap involves a few key steps. First, gather your ingredients. You will need oils, lye, water, and any additional scents or colors.
Next, prepare your workspace. Safety is important. Wear gloves and goggles to protect your skin and eyes. Then, mix the lye with water. This causes a chemical reaction, so be careful. Stir until the lye dissolves completely.
Heat the oils to around 100 degrees Fahrenheit. Once both the lye solution and oils are at the correct temperature, slowly mix them together. Stir gently but consistently. You will notice the mixture thickening. This is called “trace.”
Add your chosen scents, colors, and any other additives. Pour the mixture into a mold. Let it sit for 24 to 48 hours. After this, remove the soap from the mold and cut it into bars. Allow the bars to cure for 4 to 6 weeks. This helps the soap become hard and long-lasting.
Popular Cold Process Recipes
Many recipes can be tried with the cold process method. One popular choice is lavender soap. Lavender has a calming scent and is gentle on the skin. Another favorite is oatmeal and honey soap. Oatmeal soothes the skin, while honey adds moisture.
For a refreshing option, try peppermint soap. The minty scent is invigorating and perfect for morning showers. If you prefer something more luxurious, make a shea butter soap. Shea butter is rich and creamy, providing excellent moisture.
Experimenting with different recipes can be fun and rewarding. Each batch of soap is unique and can be tailored to your preferences. Start with simple recipes and gradually try more complex ones as you become more comfortable with the process.
Credit: thethingswellmake.com
Hot Process Soap
Hot process soap making is a fantastic way for beginners to start crafting their own soap. This method uses heat to speed up the saponification process. The result? A rustic-looking, ready-to-use soap in a shorter amount of time.
The hot process method can be done using a slow cooker or a double boiler. This ensures the soap mixture stays warm and allows the ingredients to blend effectively. The end product is often more textured than cold process soap, giving it a unique charm.
Step-by-step Guide
Start by gathering all your ingredients and tools. You’ll need oils, lye, water, a slow cooker, and molds.
First, measure the water and lye in separate containers. Slowly add the lye to the water, stirring until dissolved. Set aside to cool.
Next, measure and melt your oils in the slow cooker. Once melted, let the oils cool to around 120°F.
Pour the lye solution into the melted oils. Blend with a stick blender until it reaches a thick trace.
Cover the slow cooker and cook the mixture on low. Stir every 15 minutes until it looks like mashed potatoes. This usually takes about 1-2 hours.
Once the soap reaches the mashed potato stage, it’s done. Spoon it into molds and let it harden for 24 hours. Unmold and cut into bars. The soap is ready to use right away, but curing for a week improves its quality.
Popular Hot Process Recipes
Lavender Oatmeal Soap: This soothing soap combines lavender essential oil and ground oatmeal. It’s perfect for sensitive skin.
Citrus Burst Soap: A refreshing blend of orange and lemon essential oils. This soap energizes and refreshes.
Charcoal Tea Tree Soap: Activated charcoal and tea tree oil create a cleansing bar. Ideal for acne-prone skin.
Honey Almond Soap: A sweet-smelling soap with honey and almond oil. It moisturizes and nourishes.
These recipes are easy to follow and yield fantastic results. Each one provides unique benefits and delightful scents. Experiment with different oils and additives to create your signature soap.
Melt And Pour Soap
Melt and Pour Soap is a popular choice for beginners. It’s easy, fun, and safe. You simply melt a pre-made soap base and pour it into molds. This method allows you to create beautiful, homemade soap without handling lye.
Step-by-step Guide
Follow this simple guide to make your own melt and pour soap:
- Choose Your Soap Base: There are many options. Some common ones include glycerin, shea butter, and goat milk.
- Cut the Soap Base: Cut the base into small cubes. This helps it melt evenly.
- Melt the Soap Base: Use a microwave or double boiler. Heat until fully melted.
- Add Fragrance and Color: Stir in your favorite essential oils and soap colorants.
- Pour into Molds: Carefully pour the melted soap into your chosen molds.
- Let it Set: Allow the soap to cool and harden. This can take several hours.
- Remove from Molds: Once hardened, gently pop the soap out of the molds.
- Enjoy! Your homemade soap is ready to use or gift.
Creative Melt And Pour Ideas
Here are some fun and creative ideas to make your melt and pour soap unique:
- Layered Soaps: Pour different colored layers for a beautiful effect. Let each layer set before adding the next.
- Embedded Objects: Place small toys, loofahs, or dried flowers inside your soap.
- Swirled Colors: Use a toothpick to swirl different colors together.
- Herbal Additions: Add dried herbs like lavender or chamomile for a natural touch.
- Seasonal Themes: Use molds and colors that match the season, like pumpkins for fall or snowflakes for winter.
Melt and Pour Soap is perfect for beginners. It offers endless creativity and is easy to master. Start today and enjoy making your own beautiful soaps at home.
Adding Colors And Fragrances
Adding colors and fragrances to homemade soap can be fun. It adds a personal touch to your creations. This section will guide you on how to use natural colorants and the differences between essential oils and fragrance oils.
Natural Colorants
Using natural colorants in your soap is safe and easy. They come from plants, herbs, and other natural sources. Here are some popular natural colorants:
- Spirulina Powder: Gives a green color.
- Turmeric Powder: Adds a yellow hue.
- Beetroot Powder: Provides a pink or red tint.
- Activated Charcoal: Creates a black shade.
These natural colorants not only look good but also have skin benefits. For example, turmeric has anti-inflammatory properties. Spirulina is rich in antioxidants.
Essential Oils Vs. Fragrance Oils
Choosing between essential oils and fragrance oils can be tricky. Both have their benefits. Here’s a comparison to help you decide:
| Essential Oils | Fragrance Oils | |
|---|---|---|
| Source | Natural plant extracts | Synthetic or mixed with natural scents |
| Benefits | Therapeutic properties | Long-lasting fragrance |
| Cost | More expensive | More affordable |
Essential oils are perfect for those who prefer natural options. They offer health benefits too. Fragrance oils are great for a stronger, longer-lasting scent. They are also more budget-friendly.
By experimenting with these options, you can create unique and personalized soap. Have fun with your soap-making journey!
Troubleshooting Common Issues
Learning to make homemade soap is an exciting journey. But sometimes, things don’t go as planned. Whether your soap isn’t hardening or you’re dealing with discoloration, it’s important to know how to fix these common issues.
Soap Not Hardening
If your soap isn’t hardening, it can be frustrating. Here are some common reasons and solutions:
- Incorrect Measurements: Ensure you measure your ingredients accurately. A digital scale can help.
- Insufficient Curing Time: Soap needs time to cure. Allow at least 4-6 weeks for cold process soap.
- Temperature Issues: Monitor the temperature of your lye and oils. They should be within 10 degrees of each other before mixing.
Check your recipe and process. Patience is key.
Soap Discoloration
Discoloration can occur for several reasons. Here are some tips:
- Rancid Oils: Use fresh, high-quality oils. Old oils can cause discoloration.
- Fragrance Oils: Some fragrance oils can cause color changes. Check the manufacturer’s notes.
- Oxidation: Exposure to air can lead to discoloration. Store your soap in a cool, dark place.
Consider these factors. Adjust accordingly for better results.
Packaging And Storing Your Soap
After making your beautiful homemade soap, the next step is packaging and storing it. This not only keeps your soap fresh but also makes it look attractive. Proper packaging and storage are crucial for maintaining the quality of your soap.
Creative Packaging Ideas
Packaging your soap creatively can make it more appealing. Use simple materials like kraft paper or fabric wraps. Tie with twine or ribbon for a rustic look. Small boxes or tins also work well. Add labels with the soap name and ingredients. This gives a professional touch.
Consider using eco-friendly packaging. Recycled paper or biodegradable materials are great choices. This appeals to environmentally conscious customers. Use stamps or stickers for decoration. They add a personal touch without much effort.
Proper Storage Tips
Storing your soap correctly ensures it lasts longer. Keep soap in a cool, dry place. Avoid direct sunlight and heat, which can cause melting or fading. Store soap in an airtight container. This prevents it from absorbing moisture from the air.
Allow your soap to cure properly before storing. This usually takes 4 to 6 weeks. Place soap on a drying rack during curing. This helps air circulate around each bar. Once cured, wrap soap in paper or place in a box. This keeps it clean and dust-free.
Rotate your soap stock. Use older bars first to ensure freshness. Check stored soap regularly for signs of spoilage. Proper packaging and storage keep your homemade soap looking and smelling great.
Credit: melissaknorris.com
Frequently Asked Questions
What Ingredients Do I Need For Homemade Soap?
To make homemade soap, you need oils, lye, water, and essential oils. Popular oils include olive, coconut, and palm oils. Essential oils add fragrance.
How Long Does Homemade Soap Take To Cure?
Homemade soap typically takes 4 to 6 weeks to cure. This allows the soap to harden and develop its final properties.
Is Homemade Soap Better For Sensitive Skin?
Yes, homemade soap can be gentler on sensitive skin. You control the ingredients, avoiding harsh chemicals and allergens found in commercial soaps.
Can I Add Colors To Homemade Soap?
Yes, you can add natural colorants to homemade soap. Common options include clays, herbs, and spices, which provide beautiful, natural hues.
Conclusion
Creating homemade soap is both fun and rewarding. You control the ingredients, ensuring natural and skin-friendly products. Start with simple recipes and gain confidence. Gradually, experiment with scents and additives. Enjoy the process and the benefits of your creations. Share your homemade soap with friends and family.
They will appreciate your effort and creativity. Remember, practice makes perfect. Keep learning and improving your skills. Happy soap making!