
Making scented candles at home is easier than you might think. It’s a fun and creative way to add fragrance to your space.
Scented candles not only brighten up your home but also fill it with delightful aromas. Whether you want a calming lavender scent or a refreshing citrus aroma, making your own candles allows you to choose your favorite fragrances. Plus, it’s a great way to personalize gifts for friends and family.
In this guide, we’ll explore the simple steps to create your own scented candles. You don’t need to be an expert. Just follow along and enjoy the process. Let’s get started on this aromatic journey!
Introduction To Scented Candles
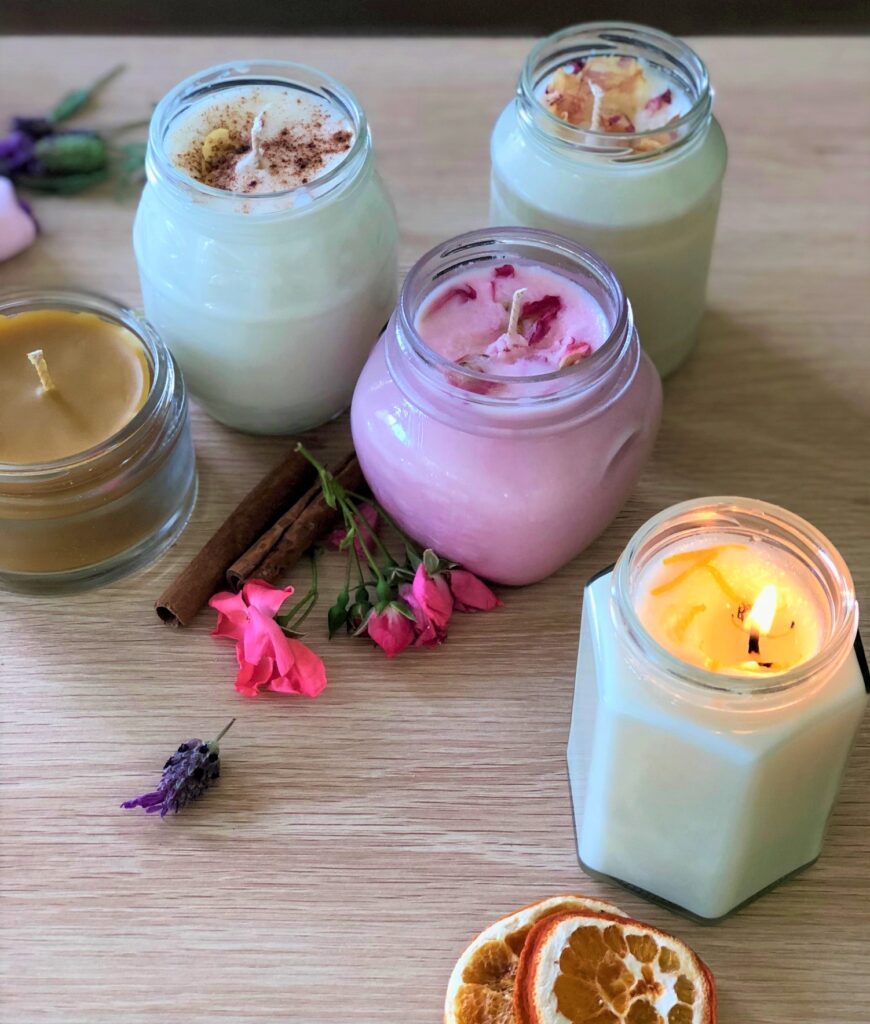
Scented candles have become a favorite in many homes. They add a touch of warmth and a pleasant aroma. Making your own scented candles can be a fun and rewarding hobby. You can customize the scent, color, and shape to suit your preferences. This guide will help you understand the basics of making scented candles.
Benefits Of Scented Candles
Scented candles offer many benefits beyond their pleasing fragrance. They can help create a calming atmosphere. Perfect for relaxing after a long day. They can also improve the mood of a room. Their warm glow adds a cozy feel to any space. Some scents can even promote better sleep or increase focus.
Popular Scents And Their Effects
Different scents can have various effects on mood and wellbeing. Lavender is known for its relaxing properties. It can help reduce stress and promote sleep. Citrus scents like lemon and orange can energize and uplift the mood. Vanilla is another popular choice. It creates a warm, comforting atmosphere. Eucalyptus and peppermint can help clear the mind and improve focus.
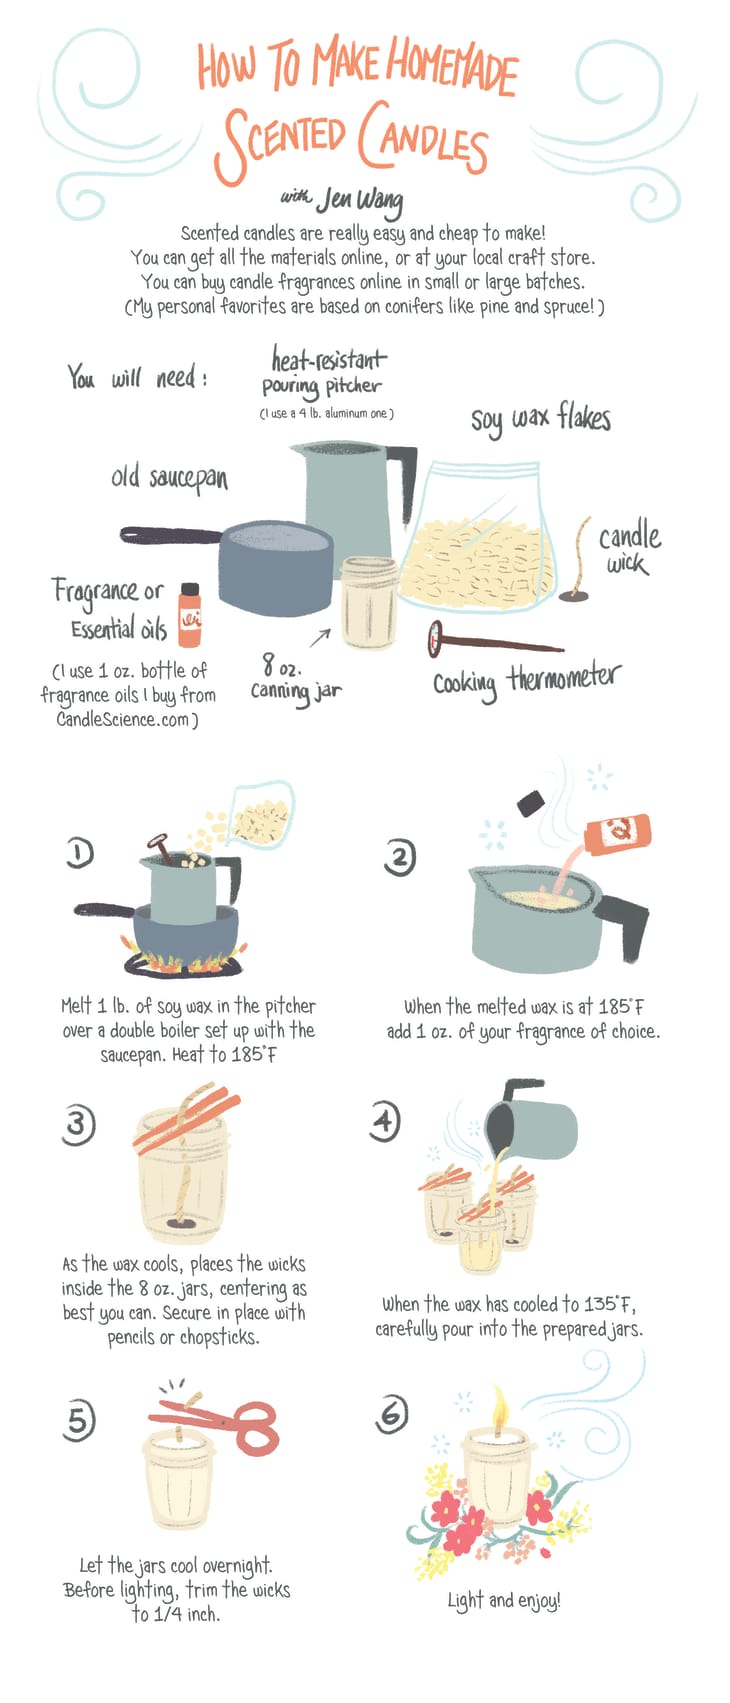
Materials Needed
Creating scented candles at home is a fun and rewarding activity. The right materials are key to making high-quality candles. This section will guide you on what you need.
Wax Types
Choosing the right wax is essential. Soy wax is popular for its clean burn and environmental benefits. Beeswax is another option, known for its natural scent and long burn time. Paraffin wax is widely available and affordable. It holds scent well but is less eco-friendly.
Essential Oils
Essential oils give your candles their fragrance. Lavender oil is soothing and great for relaxation. Peppermint oil is refreshing and energizing. Vanilla oil offers a comforting and sweet scent. Make sure to use high-quality oils for the best results.
Wicks And Containers
Choosing the right wick is important for a steady burn. Cotton wicks are a common choice for their reliability. Wooden wicks provide a crackling sound and unique experience. For containers, glass jars are safe and reusable. Metal tins are durable and stylish. Both options are great for home use and gifts.
Choosing The Right Wax
Choosing the right wax is crucial when making scented candles. The type of wax you use impacts the candle’s burn time, scent throw, and appearance. Here, we will explore three popular types of wax: soy wax, beeswax, and paraffin wax.
Soy Wax
Soy wax is a natural, renewable resource. It is made from soybeans. This type of wax burns cleaner and longer. It produces less soot than other waxes. Soy wax is also biodegradable and easy to clean up. This makes it an eco-friendly choice for candle makers. It also holds fragrance well, giving your candles a strong scent.
Beeswax
Beeswax is another natural option. It is made by honeybees. This wax has a natural, sweet scent. It burns slower than other waxes. This means your candles will last longer. Beeswax also purifies the air as it burns. It releases negative ions which help remove dust and allergens. This makes it a good choice for those with allergies.
Paraffin Wax
Paraffin wax is widely used in candle making. It is a byproduct of petroleum. This wax is cheap and holds fragrance well. It also has a long shelf life. Paraffin wax produces more soot than natural waxes. This can affect air quality. Some people avoid it for this reason. But it is still a popular choice due to its affordability and availability.
Credit: www.apartmenttherapy.com
Selecting Scents
Choosing the perfect scent for your candles can be a delightful experience. The right fragrance can evoke memories, create moods, and even influence emotions. In this section, we will explore how to select scents for your candles. This includes blending essential oils, single note scents, and seasonal scents.
Blending Essential Oils
Blending essential oils can create a unique and personalized scent. Start with a base note, such as sandalwood or vanilla. Add a middle note, like lavender or rose, for balance. Finish with a top note, such as citrus or peppermint. This combination can result in a complex and inviting aroma.
- Base Note: Sandalwood, Vanilla
- Middle Note: Lavender, Rose
- Top Note: Citrus, Peppermint
Single Note Scents
Single note scents are simple but powerful. They focus on one fragrance, allowing its true essence to shine. Popular single note scents include lavender, eucalyptus, and vanilla. These scents are perfect for those who prefer a straightforward aroma.
- Lavender: Calming and soothing
- Eucalyptus: Refreshing and invigorating
- Vanilla: Warm and comforting
Seasonal Scents
Seasonal scents can evoke the essence of a particular time of year. In winter, consider using pine, cinnamon, or clove. For spring, opt for floral scents like jasmine or lilac. Summer scents might include coconut or citrus. Autumn can feature pumpkin spice or apple cinnamon.
| Season | Scents |
|---|---|
| Winter | Pine, Cinnamon, Clove |
| Spring | Jasmine, Lilac |
| Summer | Coconut, Citrus |
| Autumn | Pumpkin Spice, Apple Cinnamon |
By carefully selecting and blending scents, you can create the perfect candle for any occasion. Whether you prefer complex blends, simple single notes, or seasonal aromas, the possibilities are endless.
Preparing The Workstation
Creating a clean and organized workspace is vital for making scented candles. A well-prepared workstation ensures safety, efficiency, and enjoyment. This section will guide you through important steps to prepare your workstation. Let’s dive into safety precautions and organizing materials.
Safety Precautions
Safety should be your top priority. Follow these guidelines to keep your candle-making process safe:
- Work in a well-ventilated area to avoid inhaling fumes.
- Keep a fire extinguisher nearby in case of emergencies.
- Wear protective gear like gloves and safety glasses to protect your skin and eyes.
- Use a thermometer to monitor the wax temperature and avoid overheating.
- Keep flammable materials away from your workstation.
Organizing Materials
An organized workstation makes the process smoother and more enjoyable. Here’s how to keep everything in order:
- Gather all necessary materials: wax, wicks, fragrance oils, and containers.
- Arrange your tools: double boiler, thermometer, and stirring utensils.
- Set up a clean, flat surface for pouring and cooling the candles.
- Label your containers to keep track of different scents and batches.
- Use a table or tray to organize smaller items like wicks and dyes.
Having everything in place will streamline your candle-making process. Happy crafting!
Credit: m.youtube.com
Melting The Wax
Melting the wax is a crucial step in making scented candles. Properly melted wax ensures a smooth and even burn. There are two common methods for melting wax: the double boiler method and the microwave method.
Double Boiler Method
The double boiler method is safe and easy. First, fill a large pot with water. Next, place a smaller pot or a heat-resistant bowl inside the larger pot. Make sure the water does not touch the smaller pot. Add your wax to the smaller pot. Turn the heat to medium and let the water simmer.
Stir the wax occasionally. This helps it melt evenly. Keep an eye on the temperature. Wax should melt around 170°F to 180°F. Once the wax is fully melted, remove it from the heat. Be careful, it will be hot.
Microwave Method
The microwave method is quick and convenient. Start by placing your wax in a microwave-safe container. Do not fill it to the top. Leave some space for expansion.
Heat the wax in 30-second intervals. Stir the wax between each interval. This helps it melt evenly. Continue this process until the wax is fully melted. Again, be mindful of the temperature. Do not overheat the wax.
Once the wax is melted, carefully remove it from the microwave. It will be very hot. Use oven mitts to protect your hands.
Adding Scents And Colors
Adding scents and colors to your homemade candles elevates the experience. Scents can evoke memories, while colors set the mood. This section guides you through the process of adding fragrances and colors to your candles.
Mixing Essential Oils
Essential oils give your candles a lovely aroma. Choose oils that suit your preferences. Popular choices include lavender, eucalyptus, and vanilla. Measure the oil carefully. Use about one ounce of oil for every pound of wax. Mix the oil into the melted wax slowly. Stir thoroughly to ensure even distribution. This ensures a consistent scent throughout the candle.
Using Candle Dyes
Candle dyes add vibrant colors to your candles. Solid dyes, liquid dyes, and dye chips are available. Melt the wax first before adding the dye. Add small amounts of dye to avoid overly dark colors. Stir the dye into the wax until fully dissolved. Test the color by dripping a bit of wax onto a white surface. Adjust the amount of dye as needed to get the desired shade.
Pouring The Candles
Creating your own scented candles at home is a rewarding experience. The final step, pouring the candles, requires careful attention. This step ensures your candles look and smell wonderful. Follow these steps to achieve the best results.
Setting The Wick
Start by setting the wick in your container. Place a small dot of hot glue at the base of the wick. Stick it firmly at the center of the container. Hold it for a few seconds until it sets. Use a wick holder or chopsticks to keep the wick upright. This will ensure the wick stays in place while you pour the wax.
Pouring Techniques
Now it’s time to pour the melted wax. Ensure the wax is at the right temperature. This is usually around 120-140°F (48-60°C). Pour the wax slowly and steadily into the container. Avoid creating bubbles. Fill the container to your desired level, leaving a bit of space at the top. This will help prevent spills.
Let the wax cool and harden. This may take a few hours. Keep the wick centered as the wax cools. Trim the wick to about 1/4 inch once the wax is solid. Your candle is now ready to enjoy!
Cooling And Setting
Cooling and setting are critical steps in making scented candles. Proper cooling ensures your candles solidify correctly, enhancing their appearance and performance. Let’s delve into the details.
Cooling Time
Allow your candles to cool at room temperature. This process takes several hours. Rushing this step can cause cracks or sinkholes. Patience is key for perfect candles. Avoid placing them in the fridge. Rapid cooling can lead to defects. Slow, even cooling helps achieve the best results.
Troubleshooting Common Issues
Cracks, sinkholes, and uneven surfaces are common issues. Cracks often occur due to rapid cooling. Ensure your candles cool gradually at room temperature. Sinkholes can form when the wax shrinks. To fix this, reheat the top layer and fill in the gaps. Uneven surfaces might result from pouring wax too quickly. Pour slowly and steadily for a smooth finish. If bubbles appear, tap the container gently. This helps release trapped air.
Finishing Touches
After creating your scented candles, adding the finishing touches makes them look professional and beautiful. These final steps are crucial for making your candles stand out and ensuring they burn properly. Let’s explore two essential finishing touches: trimming the wick and decorating the container.
Trimming The Wick
Trimming the wick is vital for an even and safe burn. A long wick can cause the flame to flicker and produce soot. Use a pair of scissors or a wick trimmer for best results.
Steps to trim the wick:
- Wait for the candle to cool completely.
- Trim the wick to about 1/4 inch.
- Ensure the wick is centered and upright.
Regularly trimming the wick also extends the life of your candle. It ensures a clean and steady flame every time you light it.
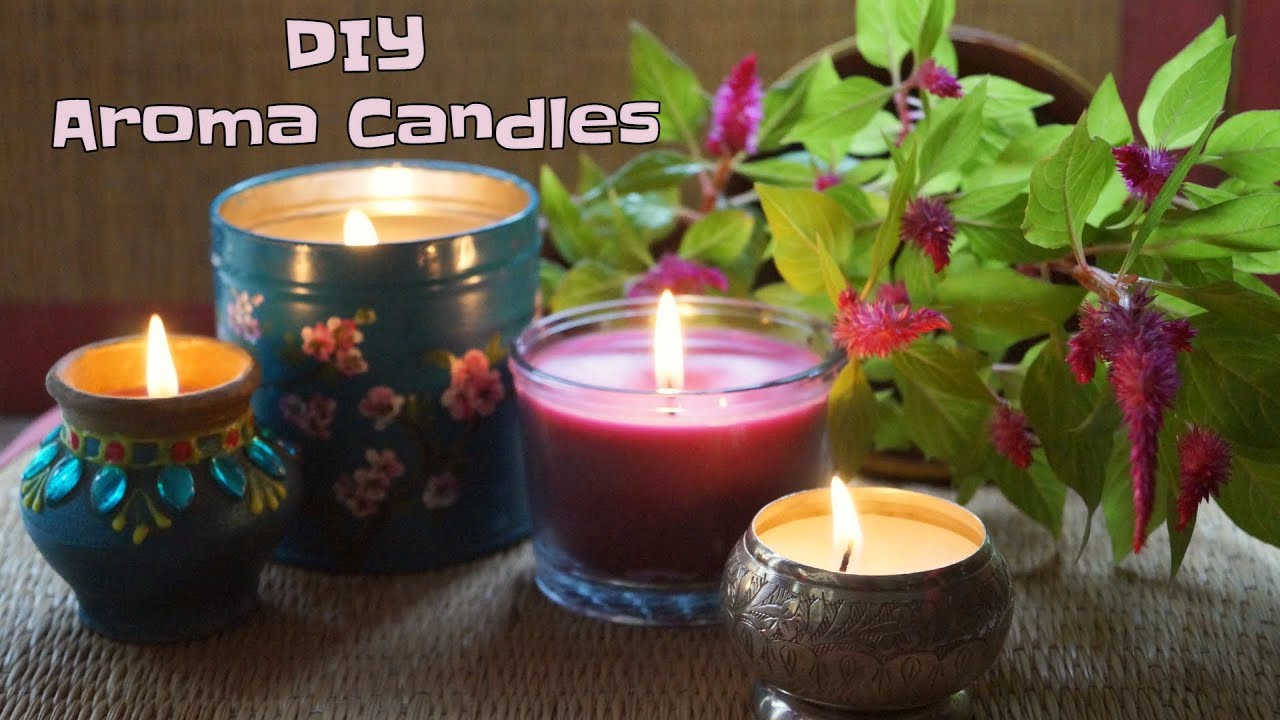
Decorating The Container
Decorating the container adds a personal touch to your candles. It makes them perfect for gifts or home decor. There are many ways to decorate your candle containers.
Popular decoration methods:
- Paint the outside of the container with acrylic paint.
- Wrap the container with twine or ribbon.
- Add stickers or labels with the scent name.
Choose decorations that match your style and the candle’s theme. For a rustic look, use natural materials like burlap or dried flowers. For a modern look, opt for sleek designs and metallic accents.
| Decoration Type | Materials Needed |
|---|---|
| Painted Design | Acrylic paint, brushes |
| Wrapped with Twine | Twine, glue |
| Label with Scent | Stickers, markers |
Adding these finishing touches makes your candles unique and beautiful. Enjoy the process of making your candles look amazing!
Candle Care Tips
Proper candle care can extend the life of your scented candles and enhance your experience. By following some simple tips, you can enjoy a longer-lasting, cleaner burn and maintain the quality of your candles.
Burning Tips
To get the most out of your scented candles, follow these burning tips:
- Trim the wick: Before each burn, trim the wick to 1/4 inch. This helps prevent soot and ensures a cleaner burn.
- Allow full melt pool: Let the candle burn until the entire surface melts. This avoids tunneling and ensures even burning.
- Burn time: Limit each burn session to 3-4 hours. This helps preserve the scent and prevents overheating.
- Extinguish safely: Use a candle snuffer to extinguish the flame. This reduces smoke and avoids hot wax splatter.
Storage Advice
Proper storage keeps your candles in great condition and ready for use.
- Keep cool and dry: Store candles in a cool, dry place away from direct sunlight. Heat and light can fade colors and scents.
- Avoid dust: Cover candles with a lid or store them in a container. This prevents dust buildup and keeps the wax clean.
- Store upright: Keep candles upright to avoid warping or deformation of the wax.
- Separate scents: Store different scented candles separately. This prevents scent mixing and maintains their original fragrance.
By following these tips, you can enjoy your scented candles longer and ensure they burn beautifully every time.

Credit: www.apartmenttherapy.com
Frequently Asked Questions
What Materials Do I Need To Make Scented Candles?
To make scented candles, you need wax, fragrance oils, wicks, and containers. You also need a double boiler, thermometer, and stirring utensil. Optional items include dye and embellishments.
How Do I Melt The Wax?
Melt the wax using a double boiler. Heat it until it reaches 170-180°F. Stir occasionally for even melting. Avoid overheating.
How Much Fragrance Oil Should I Add?
Add 1 ounce of fragrance oil per pound of wax. Stir thoroughly to mix. Adjust based on scent strength preference.
Can I Use Essential Oils In Candles?
Yes, you can use essential oils in candles. However, test for scent throw and compatibility. Not all essential oils work well.
Conclusion
Creating scented candles at home is both fun and rewarding. It allows you to choose your favorite scents and create a cozy atmosphere. With just a few supplies and simple steps, anyone can make beautiful candles. Experiment with different fragrances and colors.
Enjoy the process and the end result. Happy candle making!